Measure and Map your property
Mapping and Measuring Your Property: A Simple Guide to DIY Land Assessment
In today’s world, where technology offers endless possibilities, mapping and measuring your property has become a task you can perform from the comfort of your home. With a few clicks and some know-how, you can obtain accurate measurements of your land, helping you plan projects, and improvements, or simply understand the dimensions of your space. This article supports the video “Map and Measure Your Property,” providing a step-by-step guide on how to make precise drawings of your property using tools available to everyone.
Step 1: Access Google Maps

Begin by visiting Google Maps. This web-based service is your gateway to viewing and analyzing your property from a bird’s-eye view. Enter the physical address of your property in the search bar. Google Maps will transport you to your location, often starting with a roadside view. This feature is particularly useful for verifying you’ve got the right place, although keep in mind that the imagery might be up to 8 months old. However, for land measurement, this is generally sufficient.
Step 2: Explore Different Views
Once you’ve located your property, notice the options in the lower-left corner of the screen. Here, you can switch between different views, such as the standard map view and the satellite image. Adjusting the map’s position and size can be easily done with a scroll mouse wheel, pinch-to-zoom gestures on mobile devices, or the navigation buttons in the lower right corner. Each of these methods allows you to fine-tune your view of the area you’re interested in measuring.
Step 3: Measure Your Property
To start measuring, right-click on the map and select the “measure distance” option from the menu. This action places a dot on the map, which you can drag to stretch out a measurement line. Utilizing the satellite view can be especially helpful for identifying specific landmarks and features you wish to measure. Proceed to move from point to point, jotting down your measurements or adding them to a spreadsheet. A basic sketch of the area, annotated with these measurements, will serve as a foundation for more detailed planning.

Step 4: Capture Your Measurements
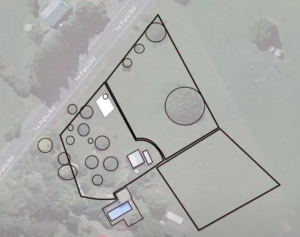
With your measurements in hand, use a screen-snipping tool (I use a paid tool called Snag-it) to capture an image of the mapped area. There are a variety of other free tools available, in addition to the snipping options built into most devices. Saving a screenshot ensures you have a visual reference to accompany your notes.
Step 5: Create Sketches

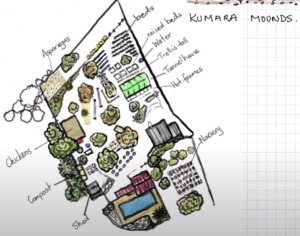
The final step involves transferring your measurements onto sketches or detailed drawings. These drawings should reflect the approximate shape and size of your property as determined by your satellite photo measurements. By starting with a rough outline, you can gradually add layers to your drawing, each representing different elements of your property, such as buildings, landscape features, and infrastructure. For instance, you might have a separate layer for water outlets and proposed irrigation pipes, which is essential for planning garden beds or agricultural projects.

This layered approach not only aids in visualizing your property’s layout but also facilitates precise planning for future projects. Whether it’s determining the length of irrigation pipes needed, calculating the area for fencing, or estimating the amount of seed for cover crops, having accurate measurements and a clear visual representation of your land can make all the difference.
By following these steps, you can effectively map and measure your property, laying a solid foundation for any project you have in mind. Whether you’re a gardening enthusiast planning your next season’s beds or a homeowner looking to make improvements, this method offers a straightforward way to understand and utilize your space to its fullest potential.


